Portrait Photography Basics: Posing and Lighting
Welcome to the wonderful world of portrait photography! This guide is specifically designed for beginners wanting to capture beautiful and flattering portraits. We'll cover fundamental posing techniques and essential lighting strategies to help you get started. Don’t be intimidated – everyone starts somewhere!
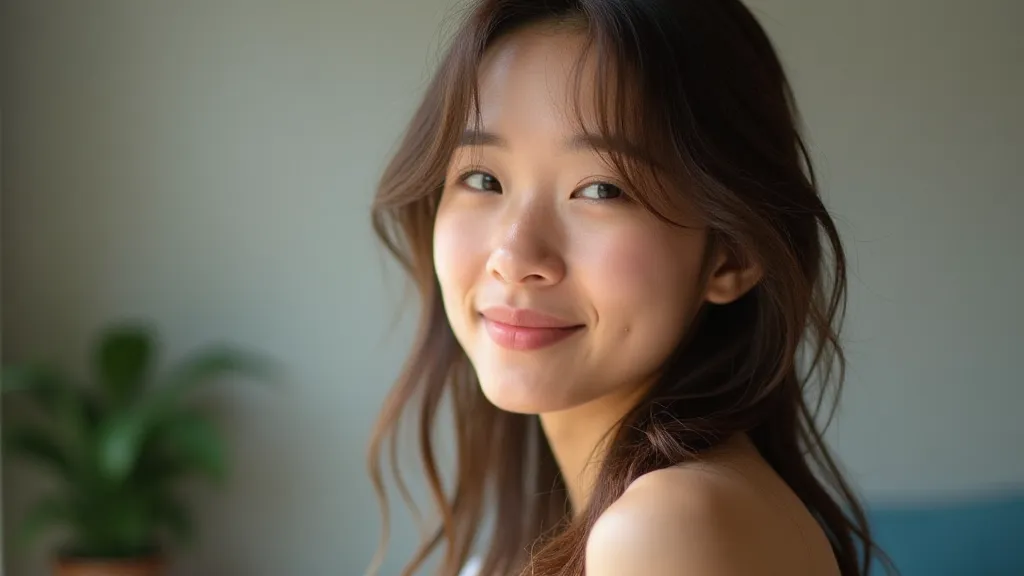
Understanding Posing: Beyond "Just Stand There"
Posing isn't about stiff, unnatural positions. It’s about guiding your subject to look their best and express a mood. Here's a breakdown of essential posing concepts:
- Angles are Key: Generally, avoid having your subject face the camera straight on. A slight turn (around 45 degrees) is almost always more flattering, creating dimension and slimming the appearance.
- Bend Limbs: Straight arms and legs can look rigid. Encourage a slight bend in elbows and knees to create a more relaxed and natural look.
- Hand Placement Matters: Hands can be tricky! Avoid having them clenched or awkwardly positioned. Suggest placing them in pockets, resting them on hips, or gently holding an object.
- Facial Expressions: While a genuine smile is always lovely, don't feel pressured to force it. Soft smiles, thoughtful looks, or even a slightly pensive expression can be equally compelling. Communicate with your subject! Consider how the unseen grammar of light impacts the mood and shadows on their face – lighting is inextricably linked to expression.
- Practice with a Friend: It’s much easier to guide someone when you can see the results in real time. Ask a friend or family member to be your practice model.
Lighting for Portraits: Creating a Mood
Lighting is arguably the most crucial element in portrait photography. It shapes the light and shadows on your subject's face, dramatically influencing the overall feel of the image. Understanding how light interacts with form is essential, and it's more than just about brightness; it’s about creating a narrative through light and shadow. Sometimes, a little bit of knowledge about the unseen grammar of light and how shadows can change the entire feel of a portrait can make a big difference.
- Natural Light: The best starting point! Look for open shade (shade that’s still illuminated by indirect sunlight) or shoot during the "golden hours" – shortly after sunrise and before sunset – when the light is soft and warm.
- Directional Light: Front lighting (light coming from directly in front of the subject) can be flat, but side lighting creates depth and shadow, highlighting features.
- Diffused Light: Hard, direct sunlight can create harsh shadows. Diffuse the light by using a reflector or a softbox (if you have one). Even a white sheet held up can act as a basic diffuser.
- Avoid Backlighting Without Diffusing: If the light source is behind your subject, you'll likely get a silhouette unless you use a flash or reflector to fill in the shadows.

Simple Posing & Lighting Combinations to Try
Here are a few basic setups to experiment with:
- Open Shade + Slight Turn: Position your subject in open shade, and have them turn slightly away from the camera. This creates a soft, even light and a more flattering angle.
- Golden Hour + Gentle Smile: During the golden hour, ask your subject to think of something happy and capture a natural, relaxed smile.
- Reflector + Side Lighting: Position your subject so the light is coming from the side, and use a reflector to bounce some light back into the shadows.

Beyond the Basics: Refining Your Portrait Photography
While these basics provide a solid foundation, truly exceptional portrait photography involves pushing beyond these boundaries. Consider how you can use leading lines to direct the viewer's eye, enhancing the overall composition and narrative of your portrait. Exploring these techniques, like incorporating leading lines, can add depth and intrigue to your work.
Understanding Color and White Balance
Accurate color is vital in portraiture. Incorrect white balance can render skin tones unnatural and distort the overall mood. When shooting, pay close attention to your camera’s white balance settings. Fine-tuning these settings is key to presenting your subject in the best possible light. If you’d like to learn more about this critical aspect, check out our detailed guide on understanding white balance.
Exploring Different Genres: Macro Portraits
Portraiture isn’t limited to traditional headshots. Consider exploring the world of macro photography to capture incredibly detailed and intimate portraits of your subjects. Focusing on tiny details – a single tear, the texture of skin – can create powerful and emotional imagery. If you're curious about getting up close and personal with your subject, explore the fascinating world of macro photography.
The Role of Post-Processing
Post-processing can be a powerful tool for enhancing your portraits, but it's important to use it judiciously. The goal should be to subtly improve the image, not to drastically alter it. Adjusting contrast, brightness, and color balance can all contribute to a more polished final product.
Gear Considerations
While you don’t need expensive gear to take great portraits, certain equipment can certainly make the process easier. A fast lens (with a wide aperture) is ideal for creating shallow depth of field and isolating your subject. A reflector is also an essential tool for bouncing light and filling in shadows. Experiment with what works best for you and your style.
Practice Makes Perfect!
Portrait photography takes time and practice. Don’t get discouraged if your first few attempts aren't perfect. Experiment with different poses and lighting setups, and most importantly, have fun! Remember that every great photographer started somewhere, and the key to improvement is continuous learning and experimentation. Keep practicing, analyzing your results, and refining your approach, and you’re well on your way to capturing stunning portraits.