Understanding White Balance: Getting Accurate Colors
Learning photography can feel overwhelming at first, but mastering even a few key settings can drastically improve your images. One of those crucial settings is white balance. Often overlooked by beginners, white balance has a huge impact on the colors you capture. This guide will explain what white balance is, why it's important, and how to use it effectively.
What is White Balance?
Simply put, white balance corrects the color of your images based on the lighting conditions. Different light sources have different "color temperatures," measured in Kelvin (K). A warm light source like an incandescent bulb has a low color temperature (around 2700K), while a cool light source like daylight or fluorescent light has a higher color temperature (around 5000-6500K).
Your camera needs to know what "white" should look like in a given scene. If it doesn’t, colors will appear skewed – too warm (orange/yellow) or too cool (blue).

Why is White Balance Important?
Imagine taking a photo of a white wall under fluorescent lighting. Without proper white balance, the wall wouldn't look white – it would look green or blue. Incorrect white balance can drastically affect the mood and accuracy of your photos. It can make food look unappetizing, skin tones look unnatural, and landscapes appear distorted. Achieving accurate color representation isn’t just about technical correctness; it’s about conveying the intended feeling and story of the scene. For photographers focusing on lifestyle or portrait work, accurate skin tones are paramount – improper white balance can render subjects looking sickly or unnatural.
Camera White Balance Settings
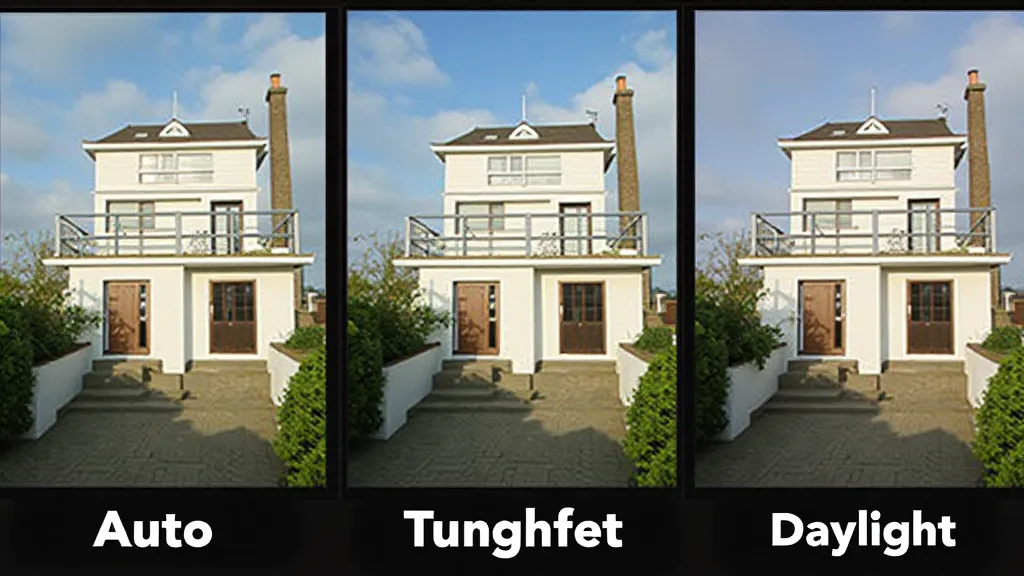
Most cameras offer a range of white balance presets. Here's a breakdown of the most common ones:
- Auto (AWB): The camera attempts to determine the correct white balance automatically. While convenient, it’s not always reliable, especially in mixed lighting conditions.
- Daylight: Designed for use outdoors in bright, sunny conditions.
- Cloudy: Adds warmth to images taken on cloudy days, compensating for the cooler light.
- Shade: Similar to Cloudy, but even warmer, suitable for shooting in the shade.
- Tungsten/Incandescent: Compensates for the warm color cast of traditional light bulbs.
- Fluorescent: Corrects the color cast of fluorescent lights, which can be very green.
- Flash: Optimized for use with camera flashes.
- Custom (or Preset): Allows you to manually set the white balance using a white or gray card.

How to Choose the Right White Balance
Here's a simple guide to selecting the best white balance setting:
Digging Deeper: Advanced White Balance Techniques
Beyond the basic presets, mastering white balance involves understanding how it interacts with other photographic elements. For example, white balance significantly influences the overall mood and aesthetic of an image. A slightly warm white balance can evoke feelings of comfort and nostalgia, while a cooler white balance can convey a sense of tranquility or melancholy. This control allows photographers to deliberately manipulate the color palette to enhance the storytelling aspect of their work. The deliberate use of color can transform ordinary scenes into compelling narratives.
Post-Processing and White Balance Correction
Even with careful in-camera settings, sometimes post-processing is necessary to fine-tune the white balance. Software like Adobe Lightroom or Capture One provides extensive controls for adjusting color temperature, tint, and highlights/shadows to achieve the desired look. Shooting in RAW format is particularly beneficial in this regard, as it preserves a wider range of color information that can be manipulated without introducing artifacts.
Specific Scenarios and White Balance Challenges
Certain situations present unique challenges when it comes to white balance. For instance, shooting interiors with mixed lighting – combining natural light from windows with artificial light sources – can be tricky. Similarly, underwater photography often requires specialized white balance settings to compensate for the way water absorbs and scatters light. Learning to identify the dominant light source and adjusting the white balance accordingly is key to achieving accurate and visually appealing results in these scenarios.
The Artistic Interpretation of White Balance
While accurate white balance is crucial for representing reality faithfully, photographers can also use it creatively to achieve specific artistic effects. A deliberate shift in color temperature can dramatically alter the mood and atmosphere of an image. Consider how a warm white balance can enhance the golden hues of a sunset, or how a cool white balance can emphasize the blues and greens of a seascape. Ultimately, the best white balance setting is the one that best serves the photographer’s artistic vision.
Practice Makes Perfect
Mastering white balance takes practice. Pay attention to how different lighting conditions affect the colors in your photos and experiment with the various white balance settings to find what works best. With a little effort, you're sure to see a significant improvement in your photography!